⚡Quick answer -
Webhook v2 lets Owners or Admins send real-time call and WhatsApp events to any HTTPS endpoint through a single, authenticated POST webhook. Create the webhook in Admin Panel → APIs & Webhooks → Webhooks (v2 tab), set authentication, pick the sub-events you need, and save. Failed deliveries retry automatically for up to 24 hours on an exponential back-off schedule (starts at 30 s, doubles each time, capped at 2 h; max 26 attempts) and every failed attempt is logged.
Webhook v1 and v2 will coexist until v1 is retired on 31 July 2026.
When should I use this guide?
Use these steps when you need to:
• Push MyOperator call or WhatsApp data into a CRM, ERP, or custom app.
• Diagnose failed deliveries, duplicate events, or missing agent data.
1. Prerequisites & Access
Role & plan matrix:
Note - Owners can optionally grant Webhooks access to Managers via Admin Panel → Permissions.
Other limits:
• Feature path: Admin Panel → APIs & Webhooks → Webhooks → v2 tab
• Max 10 webhooks per company
• HTTPS endpoints only (HTTP rejected)
• Supported auth: None, Basic, API Key (Header or Query)
2. Step-by-step setup
1. Open Webhooks (v2)
- Click “+ Add Webhook” (or “Create first Webhook” if empty).
- The Add New Webhook form opens as a full-page two-panel layout. The left panel is for Endpoint Details; the right panel is for Events.
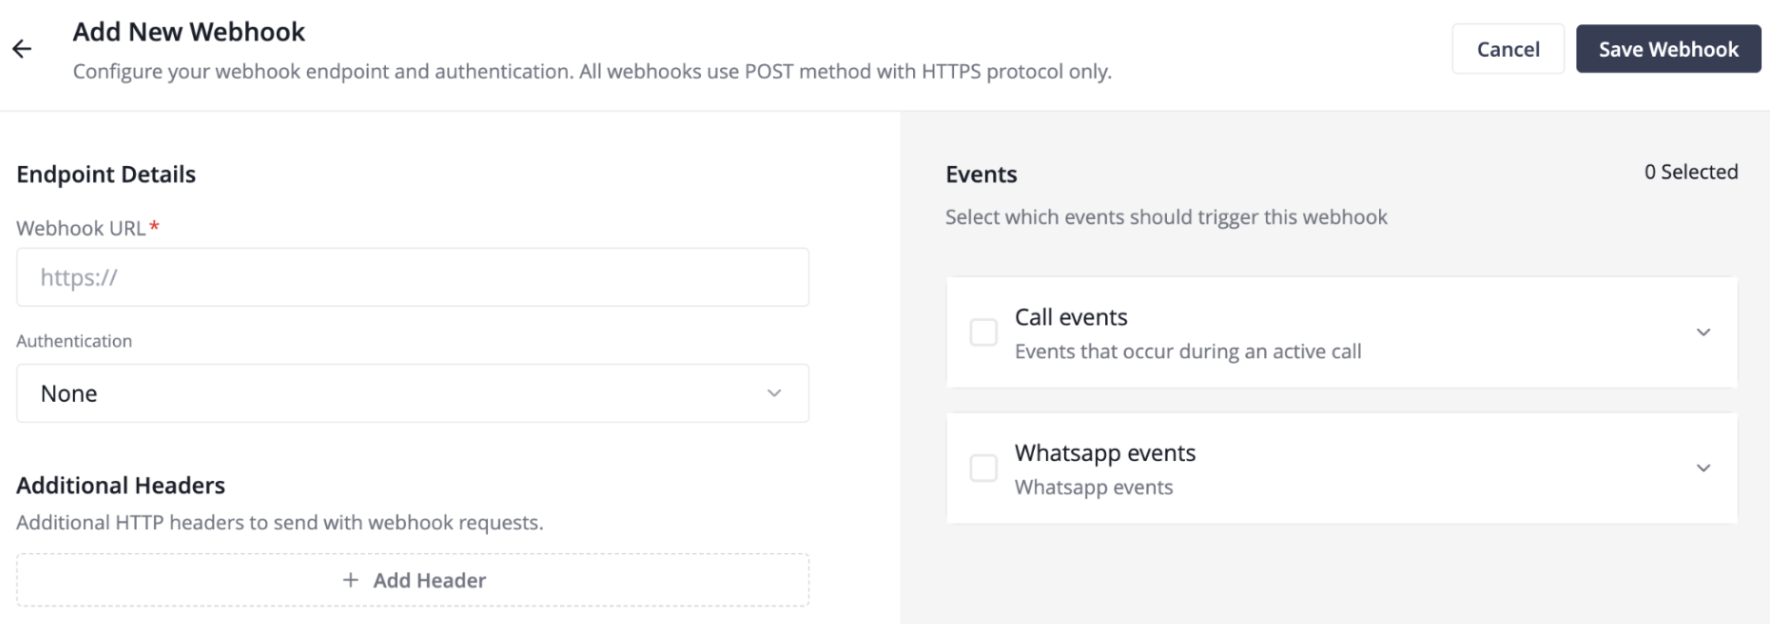
2. Endpoint details
In the left panel, locate the 'Webhook URL' field (marked with a red asterisk — required) and enter the full HTTPS URL of the endpoint where you want events delivered.
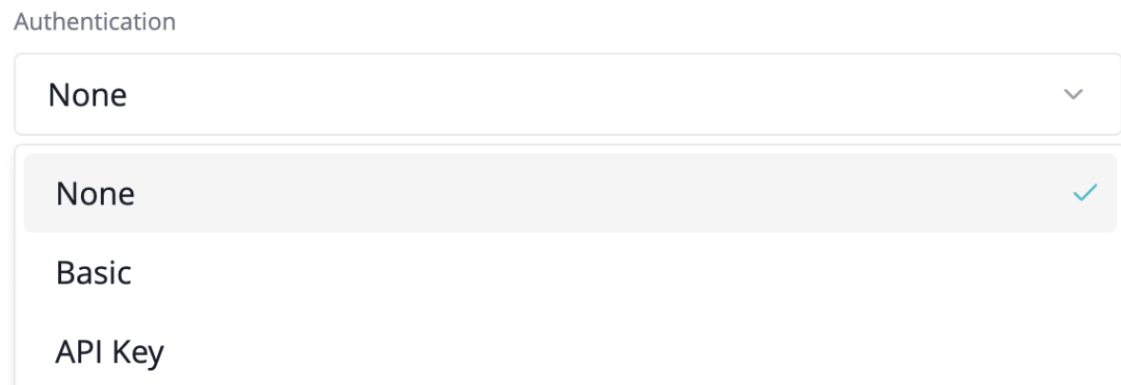
3. Authentication:
- None – public/IP-whitelisted endpoints
- Basic – Username + Password
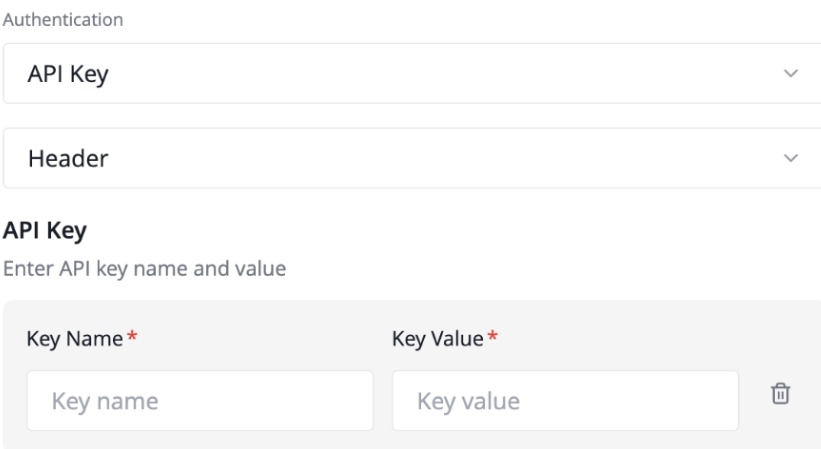
- API Key – Choose Header or Query, then enter Key Name + Key Value.
- Click ‘+ Add API Key’ to add multiple key/value pairs (max 10 rows).
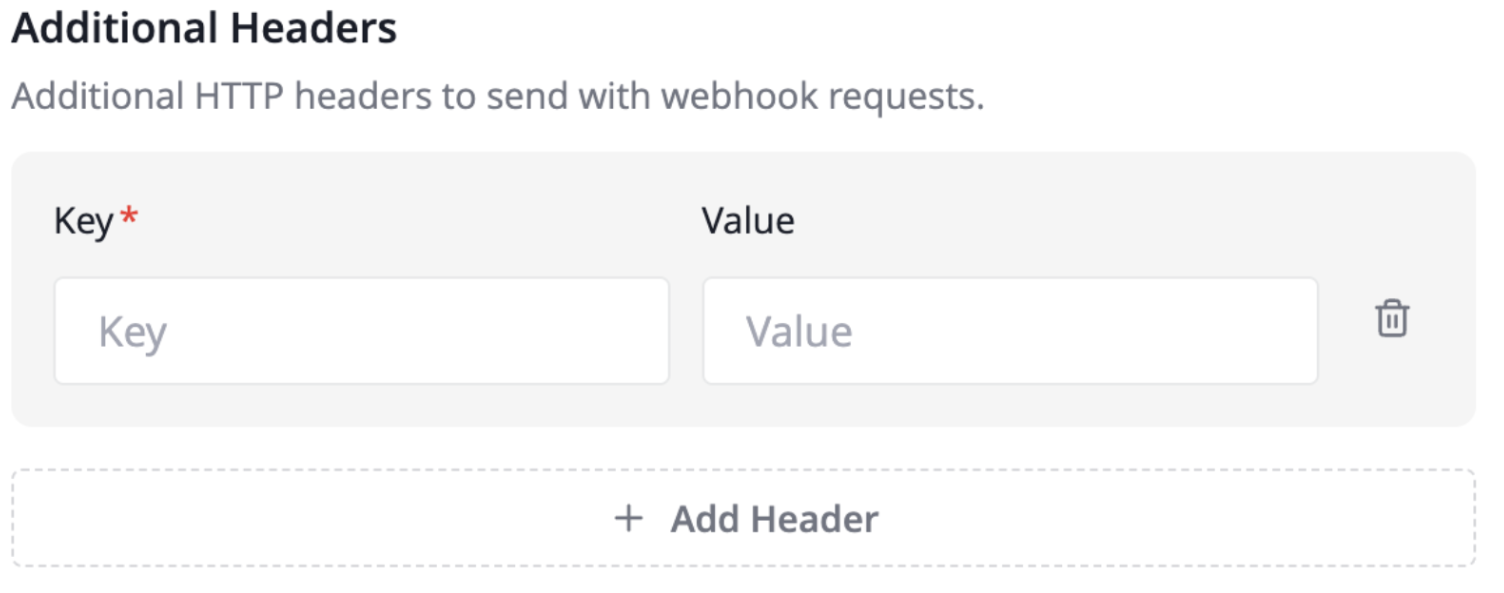
- Below the Authentication section, the Additional Headers panel is always visible.
- Click '+ Add Header' to add a custom HTTP header row. Each row has a Key field (required) and a Value field (optional).
Field Detail | Specification |
Key | Required per row. Duplicate keys show an inline error. |
Value | Optional. |
Max rows | 10 custom headers per webhook. |
Why it matters | Use this for routing metadata (e.g., X-Source: myoperator) or content negotiation headers your server requires. |
5. Event selection
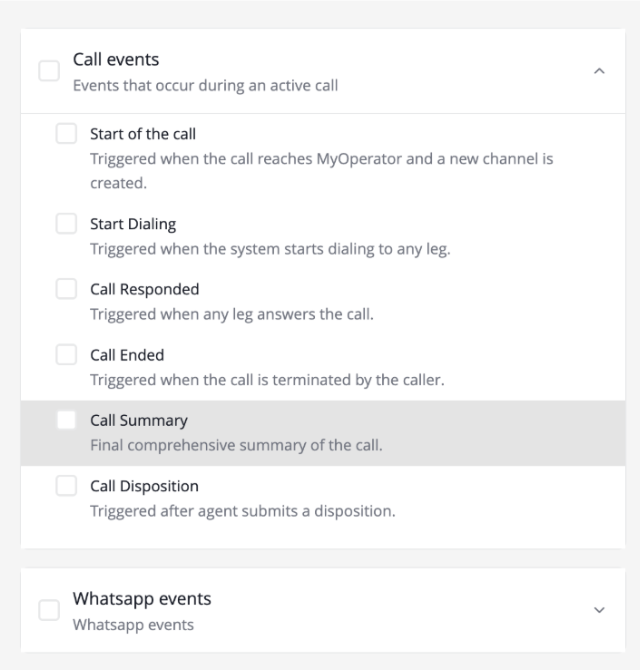
- Collapse/expand “Call events” or “WhatsApp events”.
- Tick the parent box for all, or choose sub-events individually. Example (SkillBridge Academy):
- Call Summary, Call Disposition, Message Received → “3 selected”.
Call Events — 6 Sub-Events
Sub-Event | When It Fires |
Start of the call | Call reaches MyOperator and a new channel is created. event_type: call.initiated |
Start Dialing | System starts dialing to any leg (agent or customer). event_type: call.dial_begin |
Call Responded | Any leg answers the call. event_type: call.answered |
Call Ended | Call is terminated by caller. Includes all leg data and call metadata. event_type: call.end |
Call Summary | Enriched final summary — adds agent{} objects with name, email, extension, and department{} data. event_type: call.summary |
Call Disposition | Triggered after an agent submits a disposition tag. Not sequenced — no event_sequence field. event_type: call.disposition |
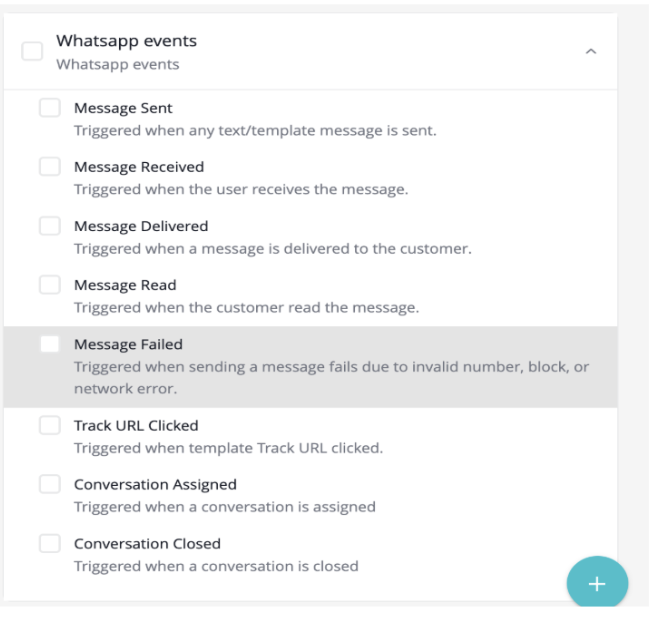
WhatsApp Events — 8 Sub-Events
Sub-Event | When It Fires |
Message Sent | Any text or template message is sent. event_type: message.sent |
Message Received | The customer sends a message to your WhatsApp number. event_type: message.received |
Message Delivered | Message is delivered to the customer's device. event_type: message.delivered |
Message Read | The customer reads the message. event_type: message.read |
Message Failed | Send fails due to invalid number, block, or network error. event_type: message.failed |
Track URL Clicked | The customer clicks a tracked URL inside a template. event_type: message.link_tracking |
Conversation Assigned | A conversation is assigned to an agent. event_type: conversation.assign |
Conversation Closed | A conversation is closed. event_type: conversation.close |
6. Save the webhook
- Click “Save Webhook” → toast “Webhook created” → list view shows Status = Active.
7. Manage afterwards
- From the Webhooks list, click the three-dot action menu (⋮) on the row you want to edit.
- Select 'Edit'. The Edit Webhook form opens with all fields pre-populated.
- The Save button is disabled until you make at least one change.
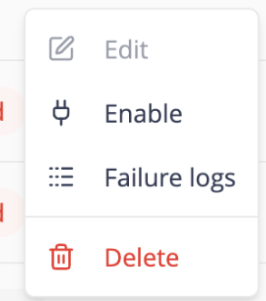
- To temporarily stop event delivery without deleting the webhook: click ⋮ → Disable.
- A confirmation modal appears: 'Are you sure you want to disable this webhook?' Click Yes.
- Status changes to Inactive (grey). The action menu now shows Edit | Enable | Delete.
- To re-enable: click ⋮ → Enable. Status changes back to Active (green)
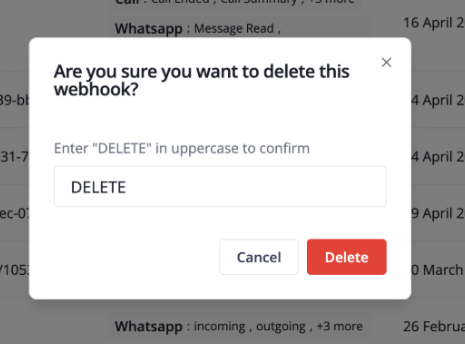
- To delete a webhook, click ⋮ → Delete.
- A modal appears with a warning icon and the message: 'This action permanently deletes the webhook.' You must type 'DELETE' in uppercase to confirm.
- Click the Delete button. The row is removed from the list. This action is irreversible.
*Note: There is no bulk delete or bulk enable/disable in this version. Each webhook must be managed individually.
3. How retry & failure logging works
- Retry window: 24 hours from the original event timestamp
- Schedule: starts at 30 s, doubles on every failure (30 s → 1 m → 2 m → 4 m → 8 m → 16 m → 32 m → 64 m, then caps at 2 h per attempt)
- Max attempts: 26 total (1 original + 25 retries)
- Subscription health: a webhook is marked Failed after 3 consecutive deliveries that each exhaust the 24-hour window without a 2xx response
- Success on any retry resets the failure counter to 0
- View logs: ⋮ → Failure logs → Inspect (eye icon) to see JSON payload & HTTP status

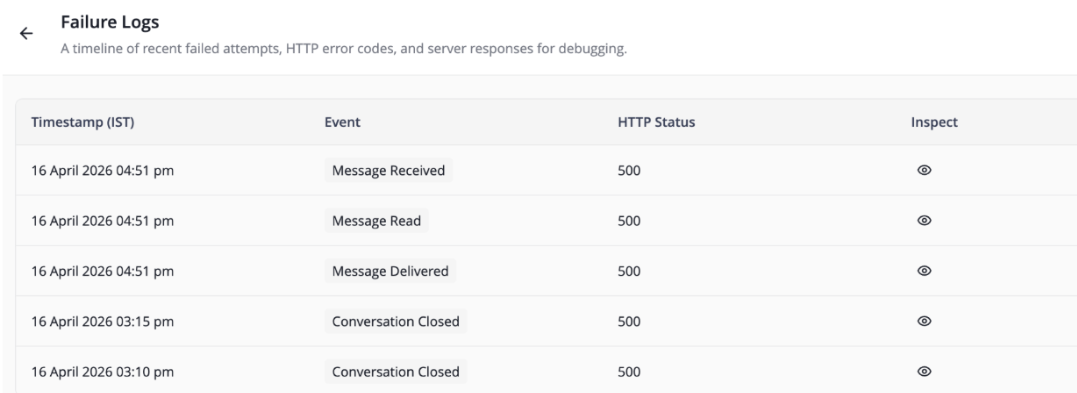
• Success on any retry resets the failure counter to 0.
4. What Webhook v2 can and cannot do
CAN
- Consolidate all call + WhatsApp events into one endpoint.
- Granular sub-event selection.
- Basic or API Key authentication.
- Up to 10 custom headers.
- Automatic exponential back-off retry (up to 24 h, max 26 attempts) + persistent failure logs.
- Enriched
agent{} and department{} data in call.summary. - Unique
event_id for idempotency; event_sequence for ordering.
CANNOT (yet)
- Send real-time email/SMS alerts on failure (logs only).
- Filter events by department, agent, or call direction—the downstream system must filter.
5. Troubleshooting FAQ